In putting the puzzle together for the first time, I realised fairly quickly that some of the longer pieces I had created were less than solid when made from Lego. My older Lego bricks do much better than newer bricks. It seems that the newer Lego is made from a softer plastic and doesn't hold together as well. Remember as a kid using your teeth to separate bricks? Well that's not a problem on new bricks!
With a little bit of care, I was able to put the puzzle together , and it did form the cube I had intended. I will be honest though, I wasn't entirely happy with the result. There were a couple of the sides which I felt weren't as good as they should have been now that I could see them and watch how they interacted, so I played around, and redesigned two sides to make things work better.
On my second attempt, I had the same issue as the first time, that the Lego really doesn't hold together too well. I'm sure I could have made the pieces larger to get more stability from the Lego, but I didn't want a puzzle that was too large. As it stands, the puzzle is about 4.5" cubed. It's a nice size to work with, and doesn't use every single brick I have lying in my spares box to make it.
So with a little care and a careful hand (along with a jig I made out of blocks to support the pieces as I moved them into position in the solution) I got the cube together. This time I was much happier with the fit, and the way the puzzle pieces interacted with each other. There is a good amount of sliding the pieces together as they interact with each other, preventing a simple push together solution.
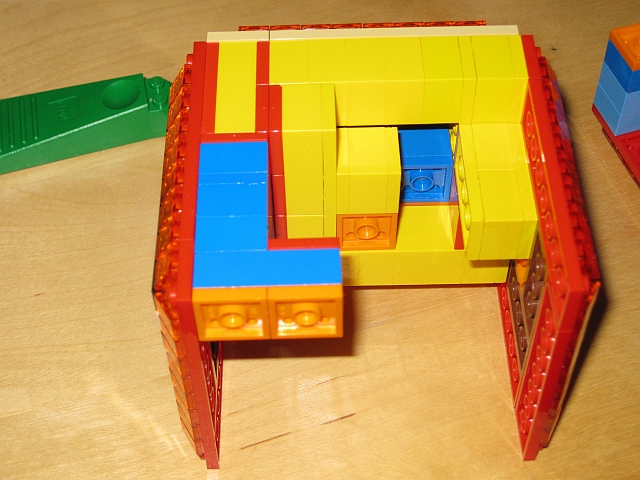
The image below shows part of the internals of the cube as I put it together. Each of the pieces here has to be slid into place, and the moved up/down etc to reach its final place in the cube. For someone not familiar with this sort of puzzle, it could be a challenge to see how things will fit in the solved cube.
At this point I was fairly happy, but there was no way anyone else could 'play' with the cube. It was too fragile, and the pieces came apart under their own weight, not to mention with someone tugging on them. At this point, there was little other option but to glue the bricks together. So with some suitable glue in hand, and my diagrams beside me to make sure things went back together correctly, I disassembled, glued and re-assembled the sides before leaving things to dry overnight.
Coming back in the morning, the pieces were solid and I could put a good amount of force on the previously weak points without any breaks or problems in the pieces. In an ideal world I would rather not have had to glue things, but at least Lego is cheaper than the Livecubes, and also easier to get, so not a huge loss.
With the prototype complete, time to give it to someone to test ...
No comments:
Post a Comment